|
Collaging - Merging 2 Images with a Layer Mask
This is a very requested technique and will be the first in our series on creating collages and
montages.
You will learn how to seamlessly blend 2 images together, using the layer masks.

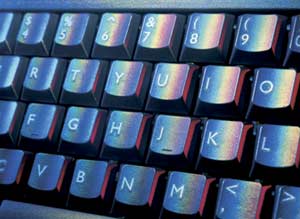
1, First thing you will need is 2 images.
Make sure they are both in the same resolution (72 dpi for the web) and mode (RGB in this case).
Open both these documents in Photoshop.

2, We will want to combine both images into 1 document.
Now select the move tool "V" key.
Drag one image into the other window and a new layer
will be created automatically with the new layer on top.
Tip: To center the new image in the window hold down the
Shift key while dragging.

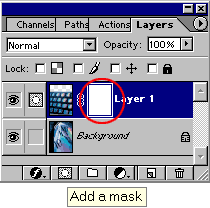
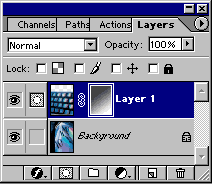
3, The Layer Mask
Click on the add layer mask button

This will create a new layer mask. A layer mask is transparent. When you paint black into the mask it
allows the image underneath to show through. Where it is white, the underlying layer will be hidden.
4, Press the "G" key to select the gradient tool. Make sure the fore and backgrounds are
set to black and white. "D" key.
Select linear gradient and foreground to background.
Now drag the gradient diagonally across the image.
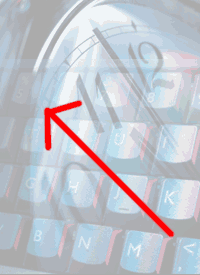
5, You can see the gradient in the layer thumbnail and the result on the image. Where it is white,
the top image shows and where it is darker the back shows through. Experiment with differant angles.
Tip: You may also use any of the brush tools on the
mask. Black will "paint away" the image and white will "paint it back". Use a soft
brush for best results.

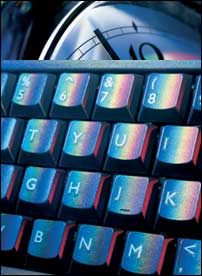
6, For an interesting variation change the layer blending mode to multiply. This makes the top image
appear as if it is a reflection in the glass on the clock.


|