Cropping, Resizing & File Formats
Ninety-nine percent of the time, I don't get too complicated
with Photoshop. I mostly pull art off a CD or the Web, then
resize it, crop it, and save it in a Web-friendly format. My
guess is that's how most people use Photoshop. Any Gilligan
could do it. In fact, Gilligan could teach someone -
say Mary Richards - how to do it. It's that easy. So let's
pretend I'm Gilligan and you're Mary (she runs a Web site
now, don't you know). Together we'll learn how to resize
images.
The first thing you need to know is that you can't add
resolution to an image, but you can always make a picture
smaller, or decrease resolution. So, to be on the safe side,
start with more than you need, then reduce the finished
image to 72 dpi (dots, or pixels, per inch) at 100 percent.
Let's start with this image:
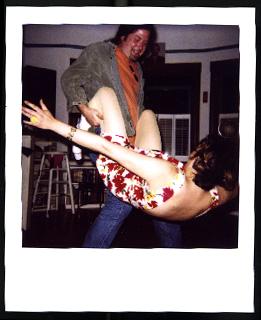
Rob Dances with Wolves
Download "Rob Dances with Wolves," open it in Photoshop,
and check out the size by going to the Image pulldown menu
and selecting Image Size. The width and height of the
document should appear in pixels, with the resolution in
pixels per inch. You have now completed the first step:
checking out the image size and determining that there is
indeed enough resolution to reduce this photo to the size of
a postage stamp.
Good job, Mary!
Cropping Up Everywhere
The next thing you'll want to do is crop the image. Click
on the marquee tool - it's on the top left of the tool
palette and should look like a square with a dotted line
(though there are four other possibilities - click and hold
to see the options hidden below, or double-click for a
palette with a whole bunch of other settings). Take your
marquee tool and select the part of the image you want to
keep by clicking and dragging. That big white border around
your picture is a good place to start trimming the fat. The
selected area will now be surrounded with a blinking dotted
line (which industry folk call "marching ants" - a secret
Photoshop insider-handshake of a phrase that can really
open doors, man). Take a look at your selection.
Anything inside the marching ants stays, and whatever's
outside goes. Happy with your proposed crop? If so, go to
Crop under the Image pulldown menu and let 'er rip.
Resizing Things Up
You're now ready to resize your image. But first make
sure it's in the right format: RGB, the most flexible of
modes. If you try to resize a file that's in the Index Color
mode (like a GIF), you'll get really chunky results (JPEGs,
however, are already in RGB). Also, some functionality will
be grayed out unless you're in RGB (or CMYK, but that's for
print and print is yucky and thus not discussed here). To
change your image over to RGB mode, select Mode from the
Image pulldown menu and choose RGB Color.
To resize, go back to the Image pulldown and select Image
Size. Enter in the size you want (either the pixel dimension
or in inches - make sure the resolution box reads "72") and
click OK.
Formatting That File
You cropped it, you resized it, and now you need to
return it to the Web. As far as images for the Web go,
you've got two options: GIF or JPEG. We're working with a photo, so
you probably want to save it as a JPEG. Go to the File
pulldown menu to Save As and select JPEG as the file format,
making sure that the file name ends in ".jpg." You'll now be
asked to select a level of compression. The more you
compress it, the smaller the file, so compress it as much as
you can bear. But be careful! Compress it too much, and
you'll lose all the subtleties of Rob's dancing.
If you want to make part of the file transparent, or if
it contains mostly solid areas of color (like type), save
that image as a GIF. First go to Mode under the Image
pulldown menu and select Index Color. You'll get a dialog
box asking a couple of questions. If your image has more
than one layer, it will ask: Do you want to flatten the
document? Your answer: Yes. Next, it will ask: How many
colors? Well, the fewer the colors, the smaller the size of
the file - 4 bit or 5 bit is usually fine, unless it's a
really important picture (of, say, your cat), in which case
you should splurge and go for the 256-color glory that 8 bit
provides.
You'll also be asked if you want dithering, but that's
one of those settings that you really should just play with
and then choose whatever looks better. Click OK and go to
.gif-89 export (before the advent of the .gif-89 export
function, you had to use DeBabelizer to get your images nice
in small jobs, but now DeBab's only necessary for big,
gnarly batch jobs since it's really a pain in the ass). Go
to File, pull down to Export and select .gif-89 export.
You'll get a dialog box that lets you select one color (or
more if you want) as transparent - you'll mostly use this
for type or for making buttons, or if you want your image to
have an edge that's not rectangular. Click OK, and you'll
get a Save As box. So save it and you're done.
|