Blending Images
One of the coolest things about Photoshop is the way it allows us to
take multiple images and combine them into one composite or
collage. Rather than using the digital equivalent of
scissors and glue, Photoshop lets us blending images
together in beautiful and creative ways.
There are a variety of techniques for
blending images. We'll start with a look at one of the
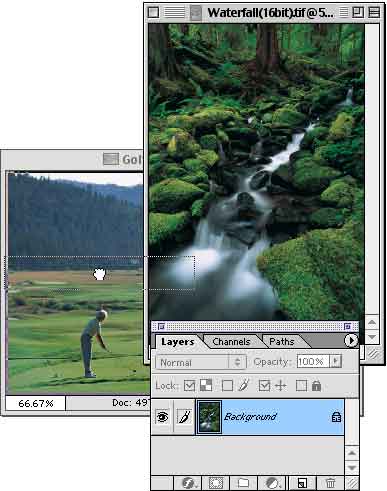
simplest. Open a pair of images that you'd like to join.
We'll use a couple of outdoor shots. You should make sure
that the color mode of the documents matches and, as in this
example, the bit depth. (Both are adjusted with the menu
command Image> Mode.)

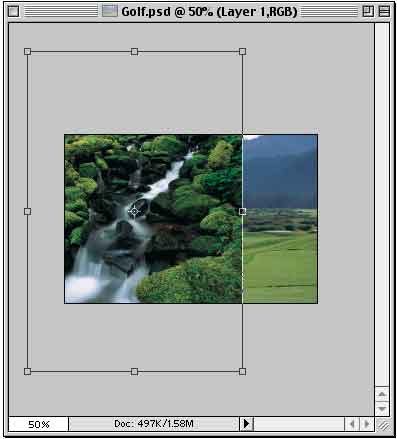
The next step is to put them into one
document. Since they're different sizes, we could use the
menu command Image> Image Size to resample one or the other.
However, since we're working at low resolution, we'll simply
scale when ready.
Copying an image from one document to
another is quite easy � simply drag from the Layers palette
of the source document onto the window of the second image.
If the source image has multiple layers, they can be dragged
one at a time or the image can be flattened first. Holding
down the Shift key while the mouse button is released will
center the dragged layer in the destination document.
Once the layer is copied, the original
source document can be closed.
In the destination image, our work image, we
now have two layers. As you can see by the bounding box, the
difference in image size is considerable. (Note that "image
size" refers to the pixel dimensions of an image, not the
print size. When you look in the Image Size dialog box,
think in terms of the pixel dimensions at the top section,
not the print dimensions in the lower part.)
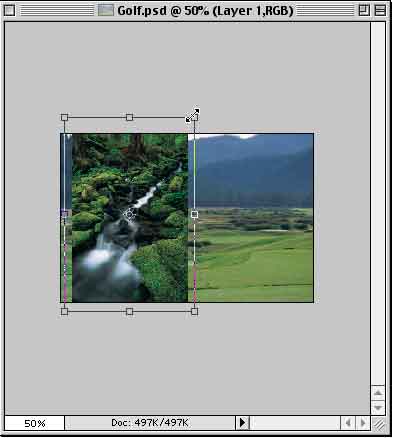
Command-T/Control-T puts us in Free
Transform mode, which allows easy resizing of the image.
(Make sure that the new layer is the active layer in the
Layers palette.) Holding down the Option/Alt key allows us
to resize with the image growing in all directions from the
"point of origin," that target-shaped symbol in the center
of the image. (The point of origin can be moved anywhere
inside or outside the bounding box to change the spot from
which you transform.) Adding the Shift key prevents
distortion while resizing by constraining the width-height
ratio of the image while you drag. In Free Transform mode,
you can also reposition an image by clicking within the
bounding box and dragging. Press Return/Enter when you've
scaled and moved as desired.
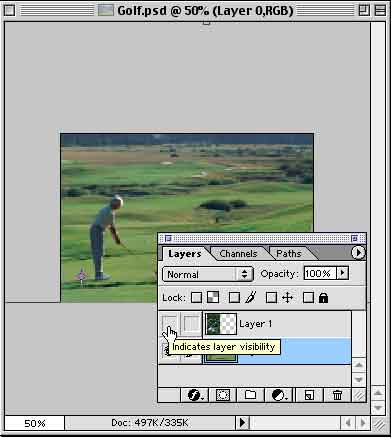
We can also scale and move the lower layer
to change the relative proportions. The upper layer can be
hidden by clicking the eyeball icon in the Layers. Remember
that you can't scale or move a layer named Background (with
the name in italics). To change a background layer to a
regular layer, Option/Alt-double-click the name in the
Layers palette and rename it.
Now that the two images are together and
sized, they need to be positioned. Lowering the opacity of
the top layer allows you to see what you're doing as you
reposition the layers. (Make sure that you click on the top
layer in the Layers palette to make it active before
reducing opacity.)

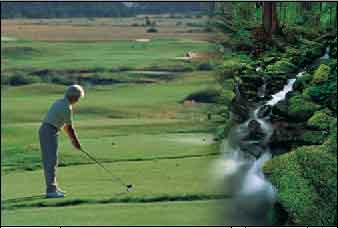
Once the images are in position we can do
the fun part, the actual blend. Right now, the two layered
images have a hard border. One stops, the other starts.
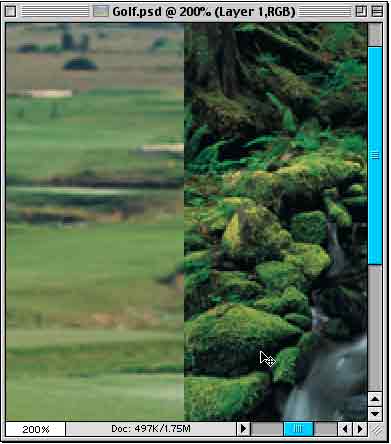
We'd rather have a nice, gentle fade between
the two images. Remember that we're working with the
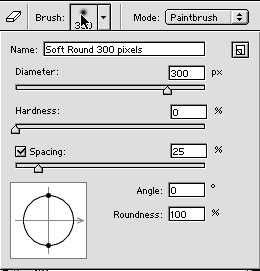
simplest technique at this point. Select the Eraser tool in
the Toolbox. In the Options Bar (or the Brushes palette for
Photoshop 5 and 5.5), select a huge soft brush. (The size
will depend on the size of your image.) Click on the brush
icon to open its specifications.
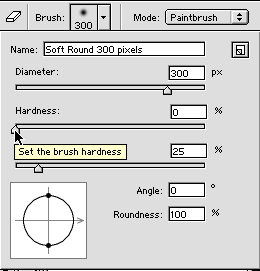
Make sure that the brush hardness is set to
zero. That ensures the softest possible brush and gives us
the greatest region of transition between the two images.
Position the cursor at the top of the image
where the two pictures meet. (In this figure, the diameter
of the cursor is represented by the dashed arc.) Click once.
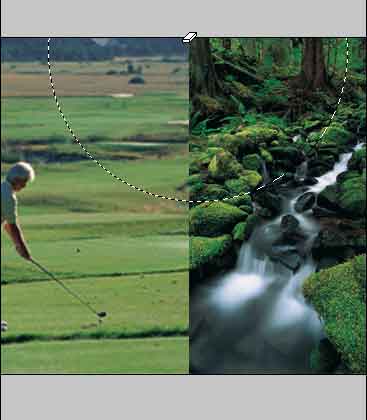
Move the cursor to the bottom of the image
where the two pictures meet and Shift-click. Holding down
Shift forces the Eraser to do its work in a straight line
between the two points that were clicked. Hiding the lower
layer shows the nice even fade created by the soft-edged
brush.
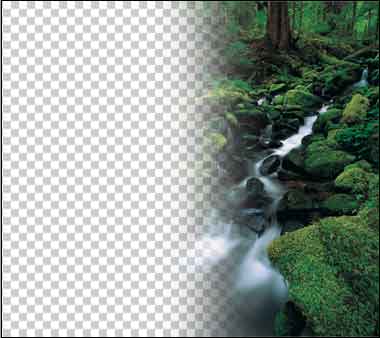
The transition between the two images is far
more appealing that the hard edged border we had a few
moments ago.
Tip: The Eraser tool can be set to a lower
opacity to emphasize the transition, and it can be used
multiple times, too. In addition, no one ever said that the
transitional line had to be straight.
|